Art Class
Yesterday was my first art class of the summer. Last summer was the first time I taught drawing. I found it was a rewarding experience. I was able to give back to the field. In my journey as an artist I found several artists who were willing to share what they knew and I was able to learn from them. So, I decided that I could pay that back. I taught a basic drawing class for adults and one for children at a local art gallery. This summer I decided to share as well. At first, I wasn’t sure if I would have anyone in my class. One of the artists in the gallery decided to come. I designed the class around her. When I arrived, I was encouraged to see that I had a total of five students! What was even more exciting was to see the results. They all went away with a drawing to be proud of.
So what did I teach? I shared some basic information, some more advanced, and just gave my opinion on their art as they worked. The information was on pencils and transfering images.
Pencils: Pencils come in a range of softness. The hardest ones are marked H (think H for hard) . They range from H all the way up to 9H with the higher number being the hardest. Hard pencils create very light lines, or inscribe (etch) lines into your paper if you press down hard. I love the 9H to create a bare hint of grey, almost white. I use it to make my lightest marks. The soft pencils are teh B’s. These are the ones I love to use for most of my drawing. Again they range from B to 9B with 9B being the softest. Soft pencils will leave a dark line with barely any pressure, especially your 4-9B ones. I build up my B pencil marks to crreate my darkest darks. An HB pencil is right in the middle on the hard to soft range. It is also what most people know as a #2 school pencil. I use this one when I am marking out my image.
Image transfering: There are several ways to transfer an image.
Mock Carbon Paper: The easiest for me, is to take a 6B or softer pencil and scribble on the back of my reference photo. Then I tape my photo to my paper on just one side. I usually tape it on the top. Then I use a mechanical pencil without the lead showing, just the plastic or metal tip, and draw the lines I need to have an outline of my picture. I lift up on the bottom of the reference phot and check to see that all the l ines are marked in. If not, I add a little more graphite to the back, without untaping it, and continue to trace. When I am done, I have a light outline in graphite on my paper and I can untape my reference photo and begin drawing.
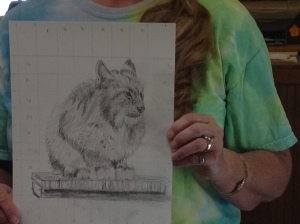
Grid: Another way of transfering the image is to use a grid. I use a 1/2 inch grid, but my ladies used a 1 inch grid and it worked just fine. To create a grid, you mark your top and bottom of your pape with 1/2 or 1 inch lines and then use your ruler to connect the lines. Then mark the same on the sides of your paper and connect the lines. In effect you are creating a graph paper. You do the same to your reference photo. This enables you to draw in small squares what you see in the square. Much like those children coloring books where you were to copy in the square what you saw. You can also draw a square on a page protector using a marker. Then your reference photo can slide in and out of the protector and you save yourself the step of creating the grid on your reference photo. Using a grid also enables you to enlarge or shrink your dring from your reference photo.
Free-hand drawing: A third and harder way for some people is to look at your photo or object that you want to draw and free-hand draw it. You look for the main shapes and outlines and place them into your drawing. This is excelent for plein air drawing or when you have a live object. I used it when I did my pastel hawk as well. I also use it when I use my carbon copy image to fill in places that were missed.
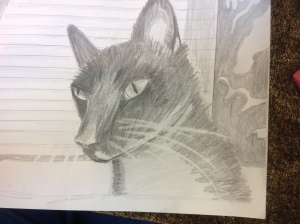
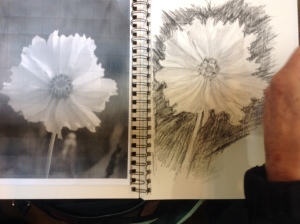
As you can tell from the pictures, the class was a success. I will be teaching similar techniques and information to children on July 7, from 1-2 pm at Art by the Sea Gallery in Old Town Bandon, Oregon.


