A photography journey and short tutorial
About three years ago, I wanted to encourage my husband’s photography ability. I helped him purchase his first DSLR (digital single lens reflect) camera. Since I was the one who wanted him to have the better camera, he said I had to be his model. So, at the drop of a hat, I would be asked to get up and let him take my photo. Sometimes he’d pose me and others he just wanted something to take a picture of. Over the last year, my use as a model has faded as his abilities has grown and he has branched out to ask others to model for his portfolio or others have asked him to take their photos. My role has shifted to one of lighting assistant. I hold the flash or the reflector to help get light to the model. I also have become his assistant in ideas. I have almost by osmosis picked up ideas from the numerous videos he has watched over the years. In this journey, I’ve learned so much about photography. I started out only knowing how to adjust zoom and take a picture on automatic mode. I’ve sat in on photography classes and learned how to operate my own DSLR. This past weekend, I was privileged to tag along on a photography workshop. I learned how to take two photo styles that I have always wanted to take: milky water and star pictures.
Milky Water:
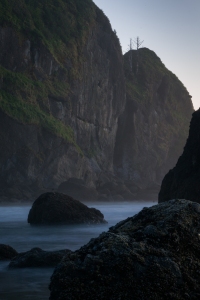
This is a technique that I understood how to do it, I just had not been able to do it. So, how do you take milky water photos? To start off with, you need a tripod. This is key. Once you have a tripod, you then need to have the lowest ISO available to your camera. For mine that’s 100. Then you want your aperture to be set to the highest it will go–for me that was between F25-F32 depending on my lens. These settings are if you are shooting in broad daylight. My camera couldn’t do that. I had to wait until dusk to get the effect on the ocean. In the mountains with waterfall pictures, this worked well. Once all of this is done, then you are ready to compose your photo and take your shot. You may want to use a remote or set your camera to self-timer to avoid any camera shake. You will want at least a half a second shutter time. Longer is better and it helps if you are up closer.
Star Photos:
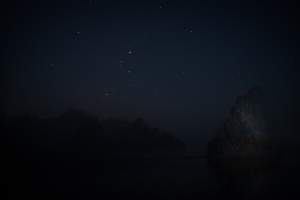
I have loved the stars from the time I can remember. They were friendly company on a night trying to fall asleep or on a long road trip. So, capturing their friendliness was my desire. To do so, again you need a tripod. Then you need to set your ISO as high as your camera will allow you and still retain quality. For my camera that is ISO 400. Newer cameras can go higher and still have integrity in the photo without having noise (that pixelated look). You want the longest exposure that you can go. Experiment. You may go as long as 30 seconds or you may push it to bulb mode and hold down the shutter for about 40 seconds or so. Note that if you go longer than 30 seconds, you will have trace movement in the stars known as star trails. Have fun. Our group decided to play with a flashlight and “painted” objects in the frame. The best shot was taken by another student who had the green of the trees and the bright stars all in one. You will also want a clear night without a lot of city light. Have fun with it.


